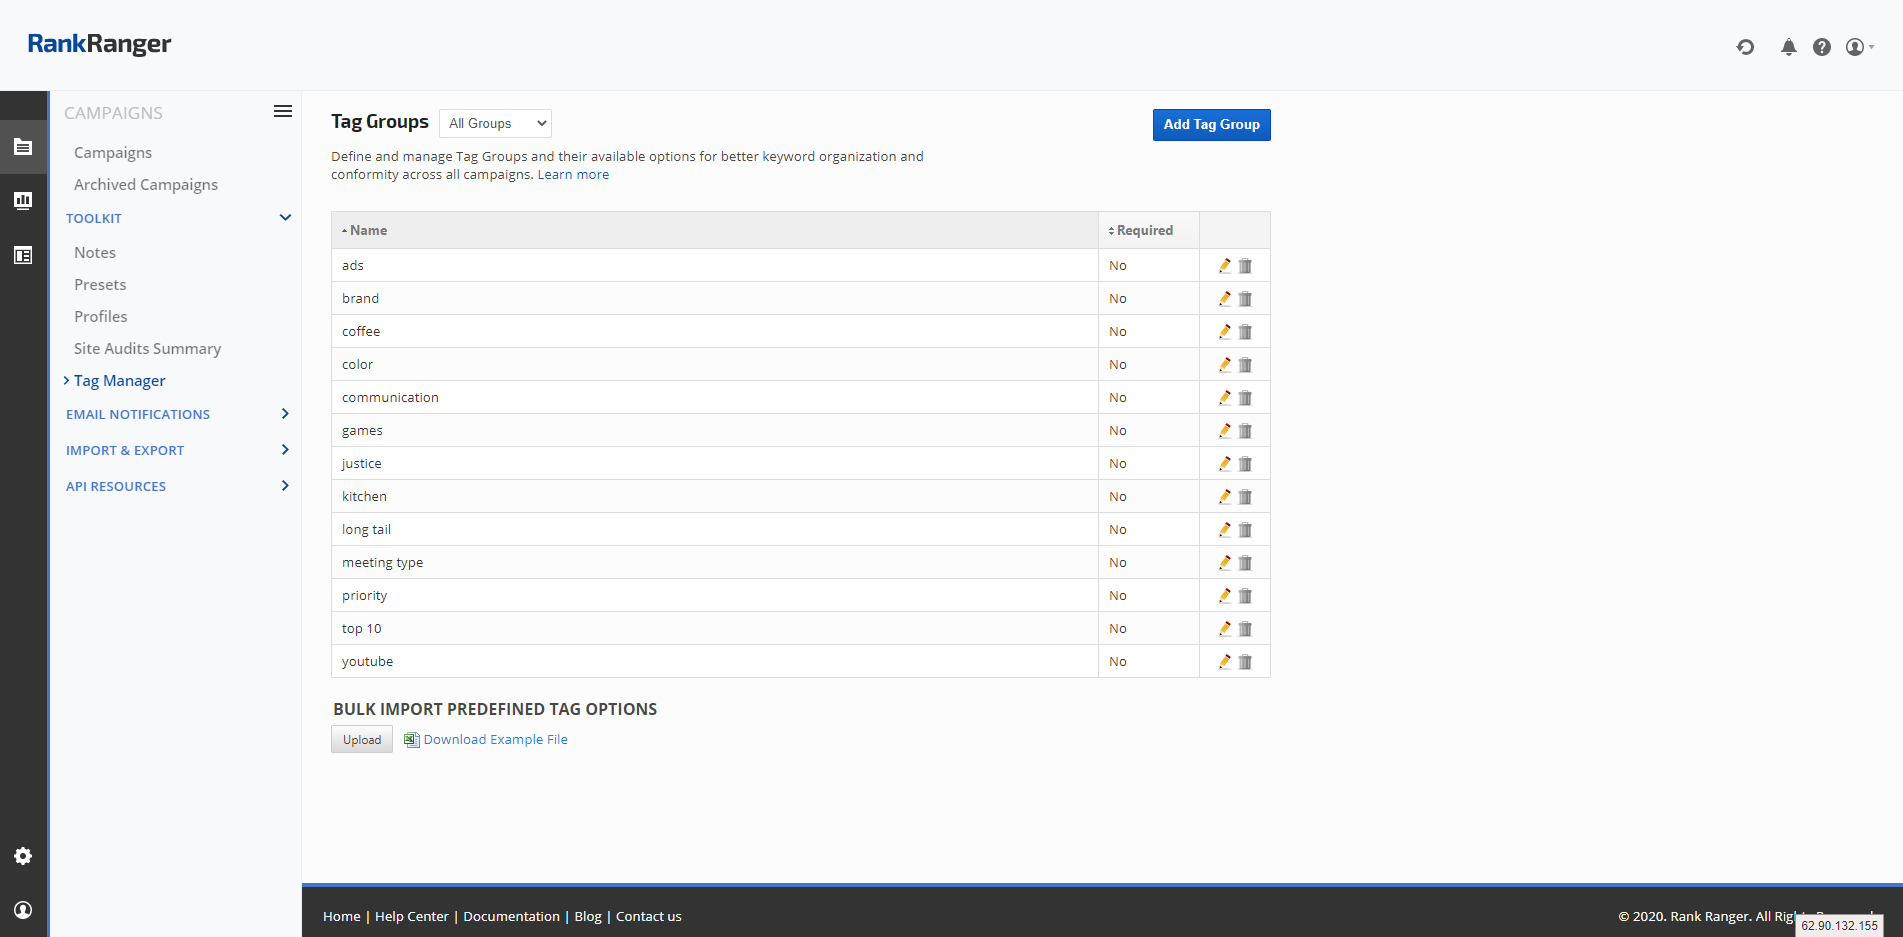
The Tag Manager feature allows you to define Tag Groups and their available options for better keyword organization and conformity across all campaigns.
Tag Groups and Tag Options should be entered in lower case in both the screen and when bulk importing tags.
Tag Manager is an account-wide feature that must be enabled in Account Settings > Default Tool Settings > Tag Manager
- SEO
- Rank Tracker
- Local SEO
- Mobile SEO
- Link Manager
- Landing Pages
- Social Signals
- On-Page Optimization
- Enterprise SEO Solutions
- Marketing
- Competition Analysis
- Insight Graph
- Keyword Research
- Graphs & Widgets
- Market Reach
- Marketing KPI
- Brand Visibility
- White Label SEO
- Marketing Dashboard
- Client Dashboard
- PDF Reports
- PDF Templates
- Other
- Email Notifications
- Portfolio Management
- Integrations
- Google Analytics
- Search Console
- Pay Per Click
- WeDevelop
- API
Tag Manager
Campaigns > Toolkit > Tag Manager
Tag Manager is Enabled or Disabled in the Account > Default Tool Settings screen.
Enable Tag Manager
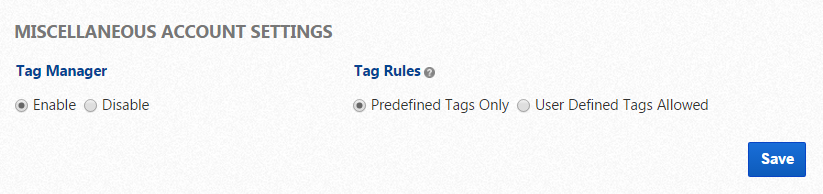
Enable Tag Manager
- Open the Default Tool Settings screen and scroll to and click on the Tag Manager section
- Select Enable (Tag Manager)
- Select the desired Tag Rule: when Tag Manager is enabled, users can select predefined tags and define new tags unless Predefined Tags Only is selected
- Click the Save button
Customize Tag Groups in Tools > Tag Manager
- Open the Campaigns > Toolkit > Tag Manager screen
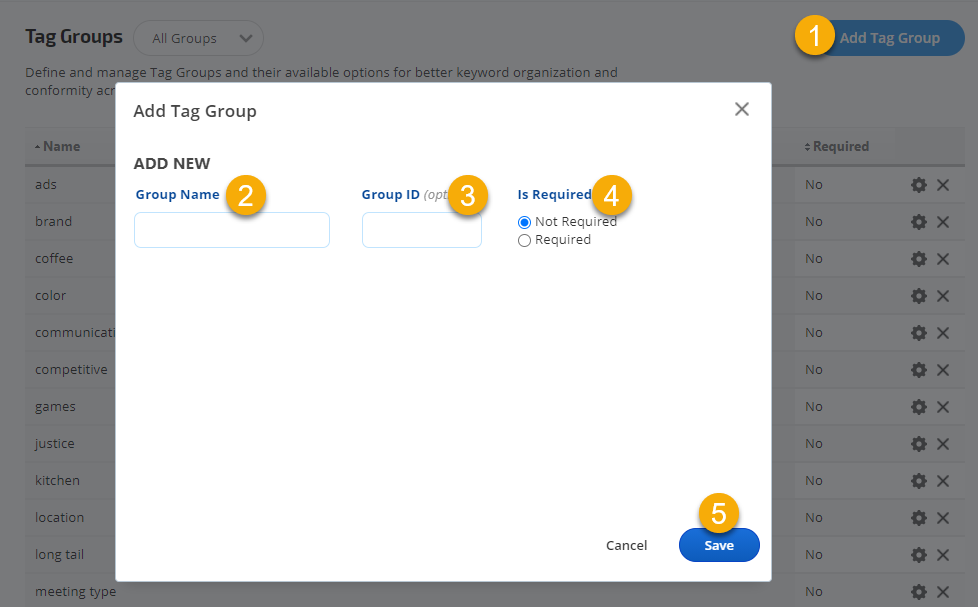
- Click the Add Tag Group button
- Enter a Group Name
- Enter a Group ID (optional)
- Select Required or Not Required (if you want a predefined option from the Group applied to all keywords, then select Required).
Tag Group Required
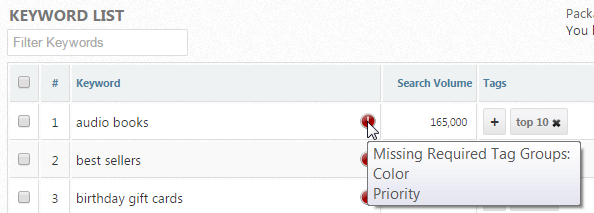
If Required is selected during the creation or editing of a Tag Group, then in the Campaign Settings > Keywords screen users will see a red warning icon indicating that a "Missing Required Tag Group: Group Name" needs to be added to the keyword.
For each tag group, you can create a list of tag options that users can choose from when assigning tags to keywords. There are several options for adding predefined tag options to a Tag Group: individual, multiple keywords/same tag or via bulk import.
Add individual Tag Group Options
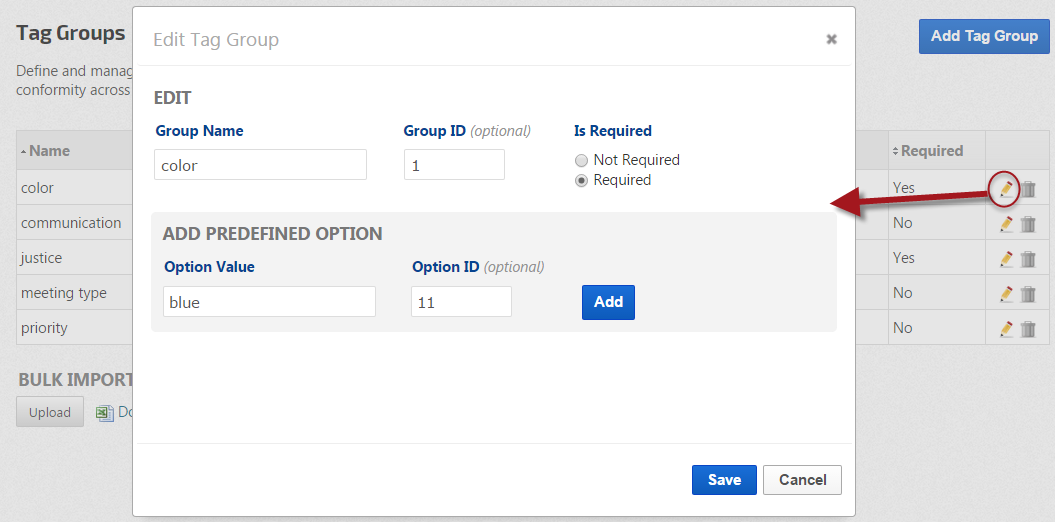
Add individual Tag Group Options
- Click the edit (pencil) icon corresponding to the Tag Group you want to add options to.
- Enter an Option Value
- Enter an Option ID (optional)
- Click the Add button
- Repeat to add more tag options to the group and click the Save button when finished.
Download Example File
Click the Download Example File link below the Tag Groups table and save it to your computer.
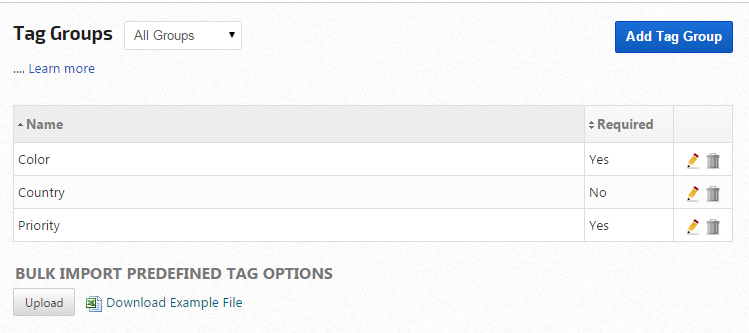
Click the Download Example File link below the Tag Groups table and save it to your computer.
Enter the Tag Options Data
Tag Groups and Tag Options must all be entered in lowercase letters.
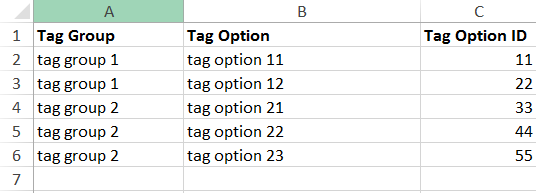
Tag Groups and Tag Options must all be entered in lowercase letters.
- Open the spreadsheet
- Enter the name(s) of Tag Groups you have previously created
- Enter the Tag Option name
- Enter a Tag Option ID (optional)
- Save the file
Upload the Tag Group Options File
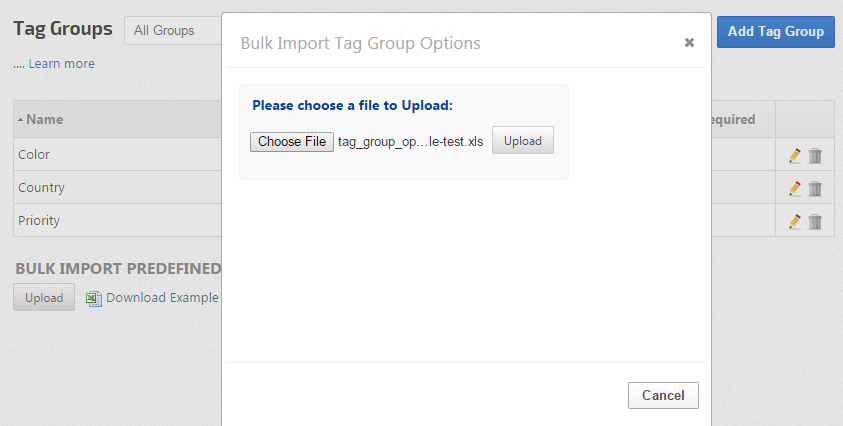
- Return to the Tag Manager screen and click the Upload button that is beside the Download Example File link.
- Click the Choose File button
- Locate and select the file on your computer
- Click the Upload button
Successful Tag Group Options Import
An Import Status message displays information regarding the success of your import. If an error occurred, follow the instructions in this message.
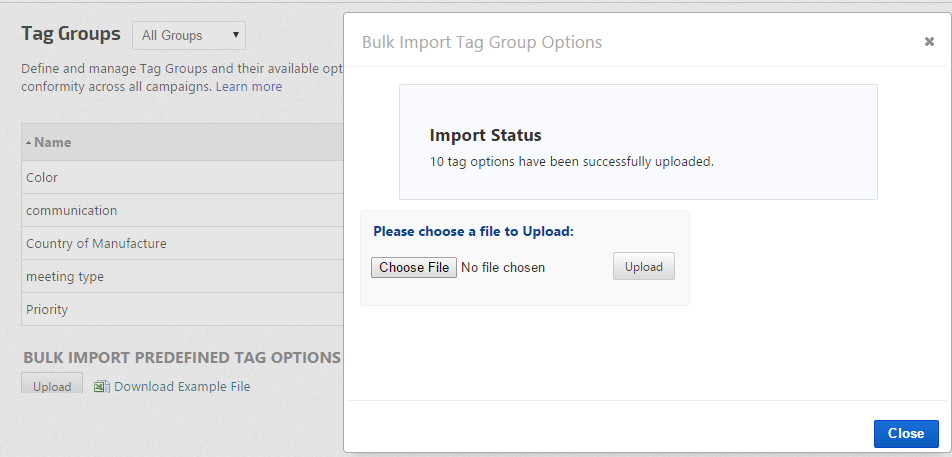
An Import Status message displays information regarding the success of your import. If an error occurred, follow the instructions in this message.
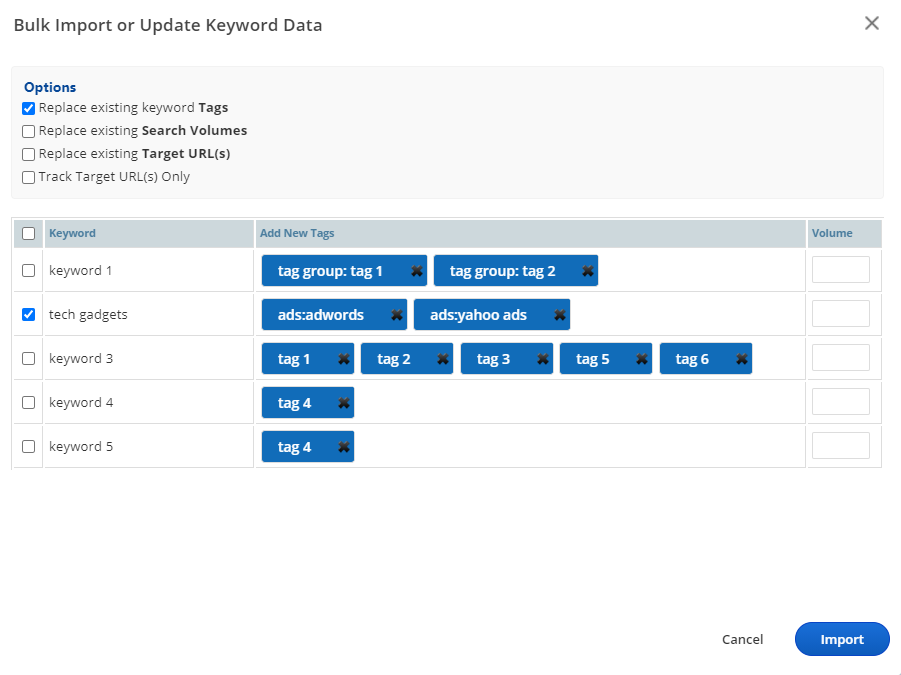
There are 2 options for adding tags to keywords: individually or via bulk import.
Individually Add Tags to Keywords
Individually Add Tags to Keywords
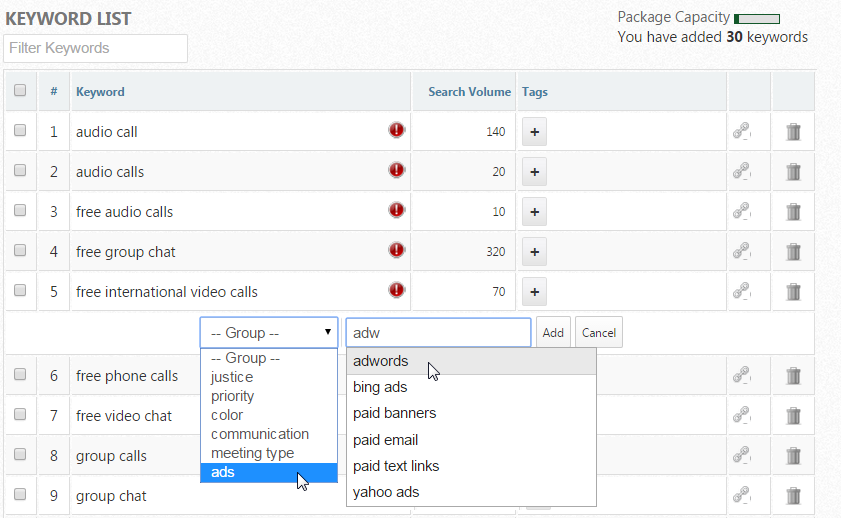
- In the Campaign Settings > Keywords screen, click the + button in the Tags column.
- Select a Tag Group
- Type the Tag Option, if the option you are typing exists in the selected Tag Group, the field will autocomplete and provide the list of all tag options, select the desired option.
- Click the Add button and the tag will display in the tag column.
Bulk Options
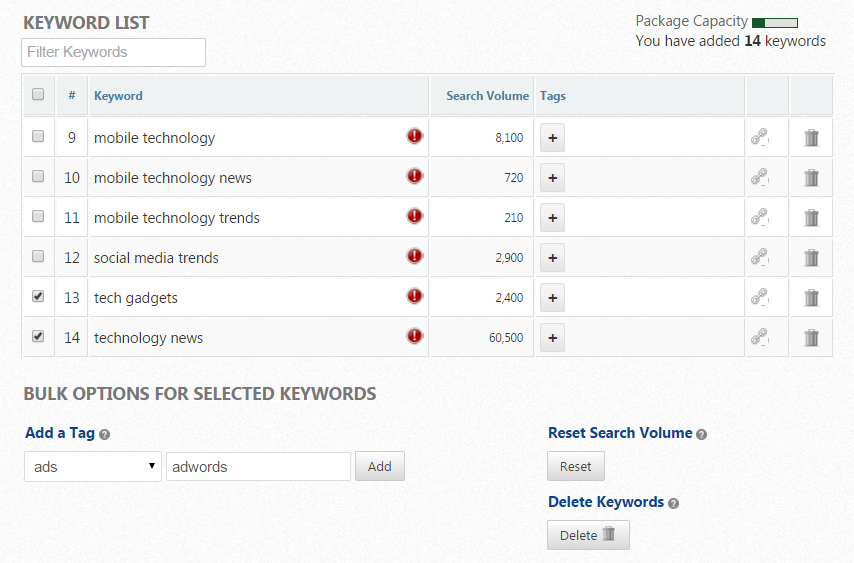
To add the same tag to multiple keywords:
- Check the box beside the keywords
- Scroll down to the Bulk Options for Selected Keywords section
- Select the Tag Group
- Enter the Tag Option name
- Click the Add button
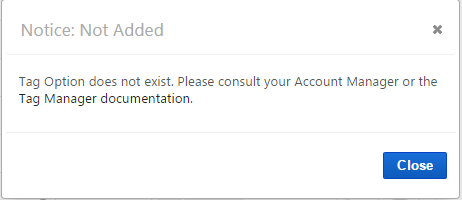
Tag Option Does Not Exist
If you attempt to add a Tag Option that does not exist in the selected Tag Group, an error message displays indicating that you need to consult with the Account Manager. If you are the Account Manager or have user permissions to manage tags, then you should open Tag Manager and confirm the Tag Options for the selected group.
If you attempt to add a Tag Option that does not exist in the selected Tag Group, an error message displays indicating that you need to consult with the Account Manager. If you are the Account Manager or have user permissions to manage tags, then you should open Tag Manager and confirm the Tag Options for the selected group.
Download Example File
In the Campaign Settings > Keywords screen, scroll down to Bulk Import or Update Keyword Data section and click the Download Example File link and save the file to your computer.
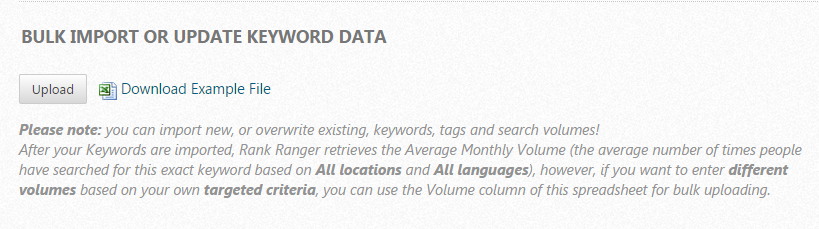
In the Campaign Settings > Keywords screen, scroll down to Bulk Import or Update Keyword Data section and click the Download Example File link and save the file to your computer.
Enter the Keyword Tags Data
Tag Group and Tag Options must be entered in lowercase letters.
Tag Group and Tag Options must be entered in lowercase letters.
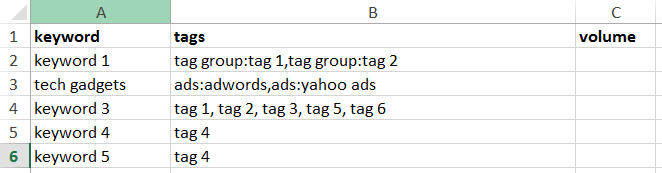
- keyword column: enter the Keywords
- tags column: if Tag Manager is Enabled, enter in tags in this format:
tag group name: tag option name
For example, if your tag group is ads and the tag option is adwords, you would enter ads: adwords
If you want to add multiple tags to 1 keyword, place a comma between them, for example:
ads: adwords,ads: yahoo ads
- volume column: if you know the local keyword volume for the keyword, you may enter it in this column to replace the global volume that Rank Ranger reports
- Save the file to your computer
Upload the Keyword Tags File
- Return to the Campaign Settings > Keywords screen and click the Upload button beside the Download Example File link.
- Click the Choose File button
- Locate and select the file on your computer
- Click the Upload button
- Review the keyword and tag data: check the boxes of the keywords & tags you want to import
If the keywords already exist in the campaign, you can check the Delete and replace existing Tags option, as well as the replace existing Search Volume (if applicable) - Click the Import button and confirm that tags are imported as you expected.