Search our Knowledge Base
Search

Account Logos


Your account logo displays in White Label Marketing Dashboards, Client Dashboards and PDF reports, and reports exported from the user interface, by default.   

There are multiple options available for placing logos on your reports:
Account-wide: Upload a default logo through Account Settings > Account Logo

Marketing Dashboards: The account logo uploaded in this screen is displayed by default in Marketing Dashboards, learn more about dashboard logo options.

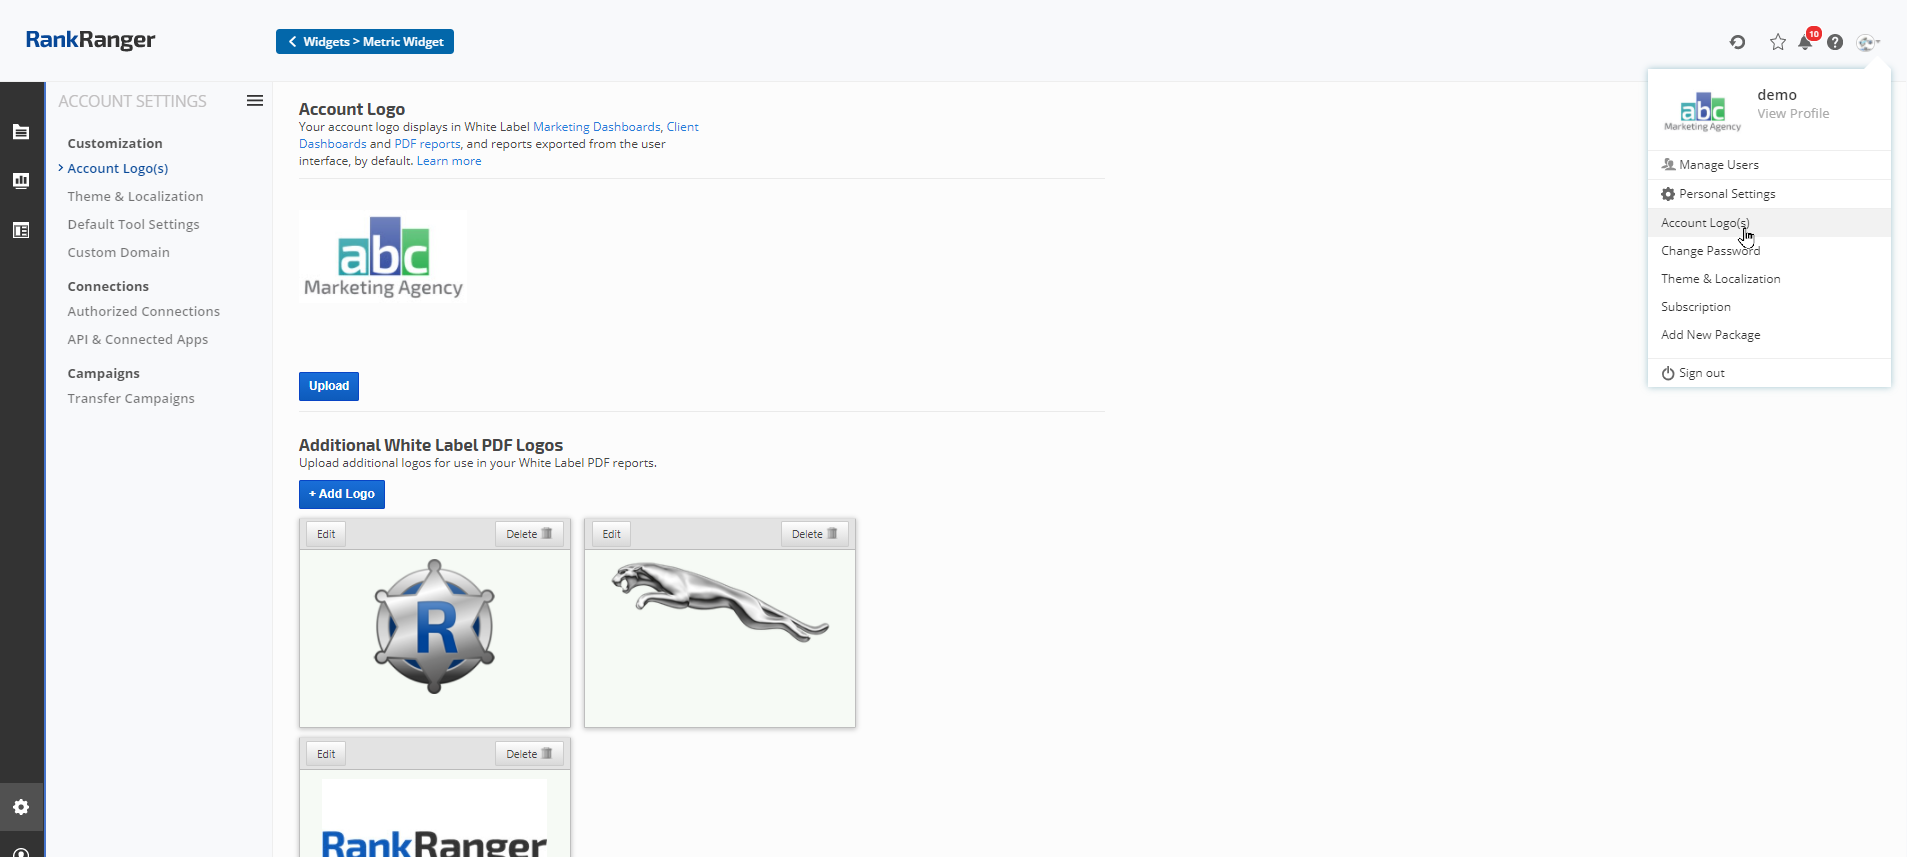
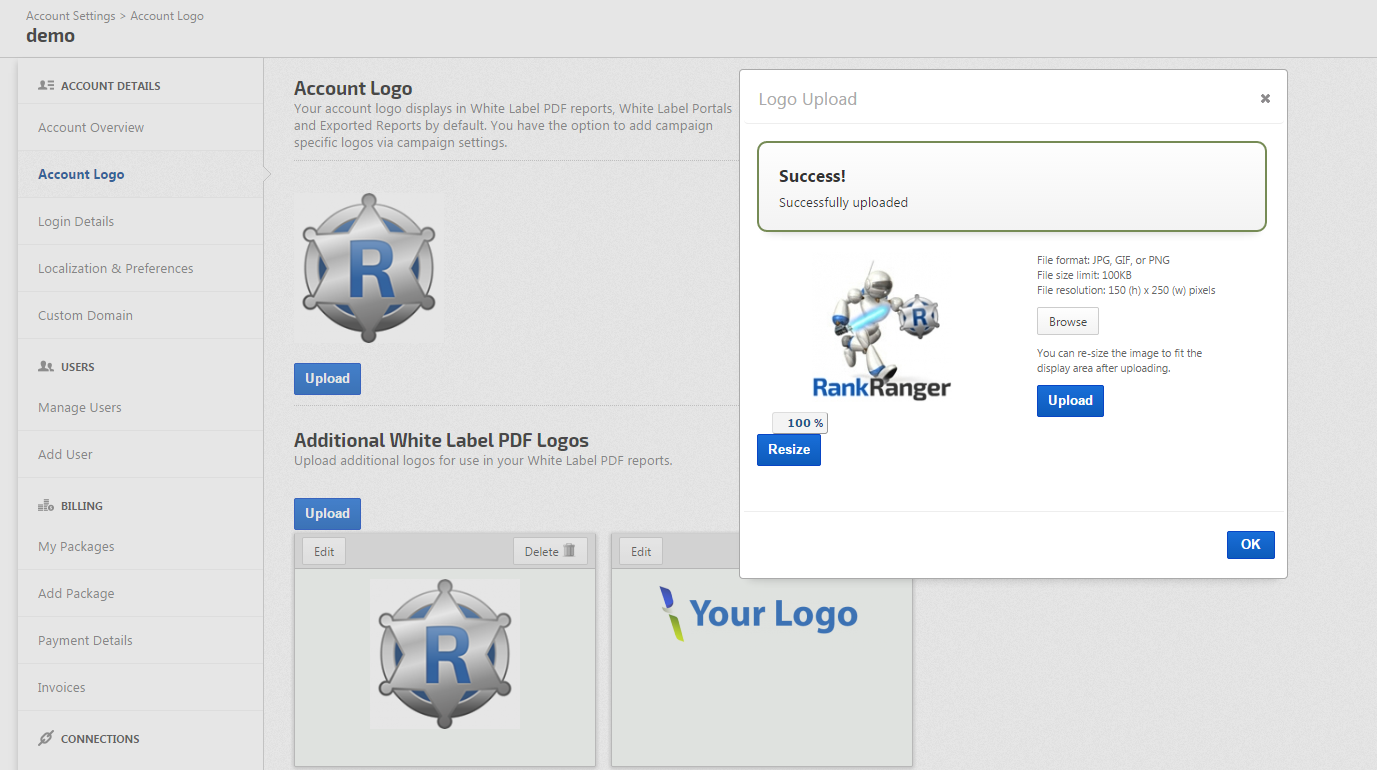
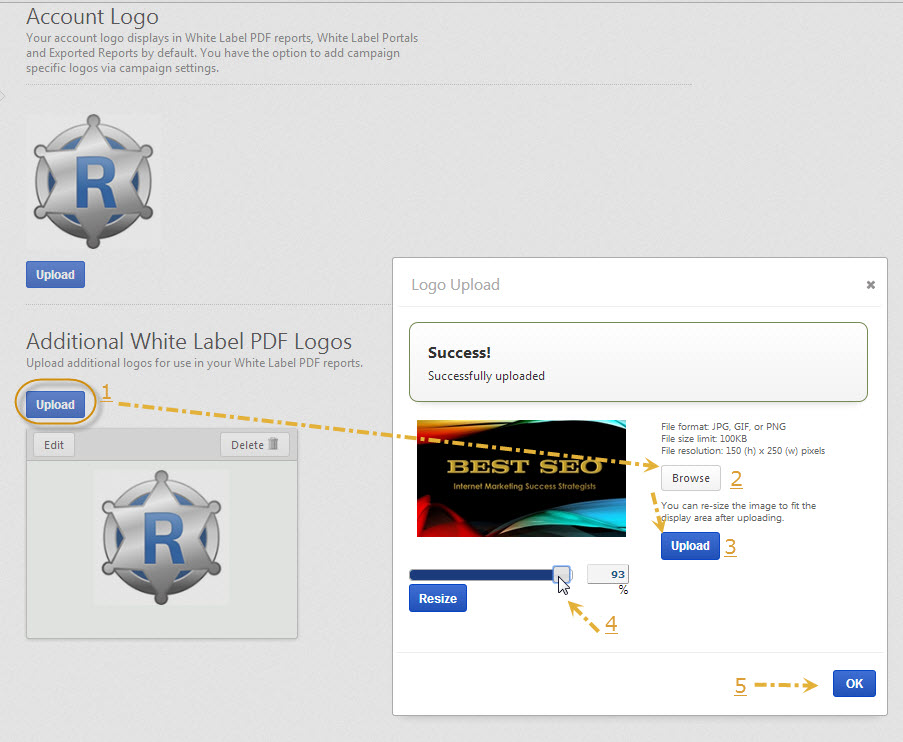
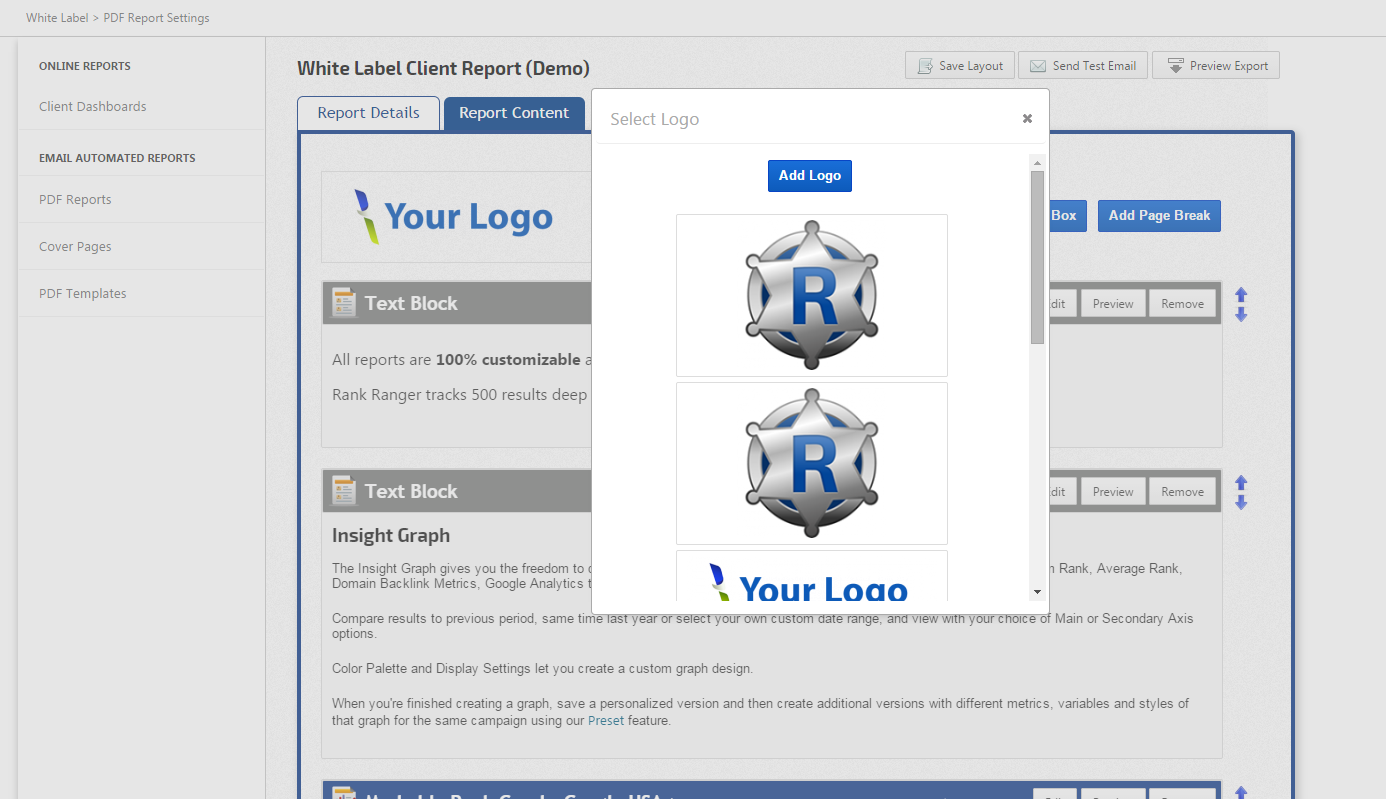
White Label PDF Reports: Upload additional White Label PDF report logos through Account Settings > Account Logo and select one for each PDF report.

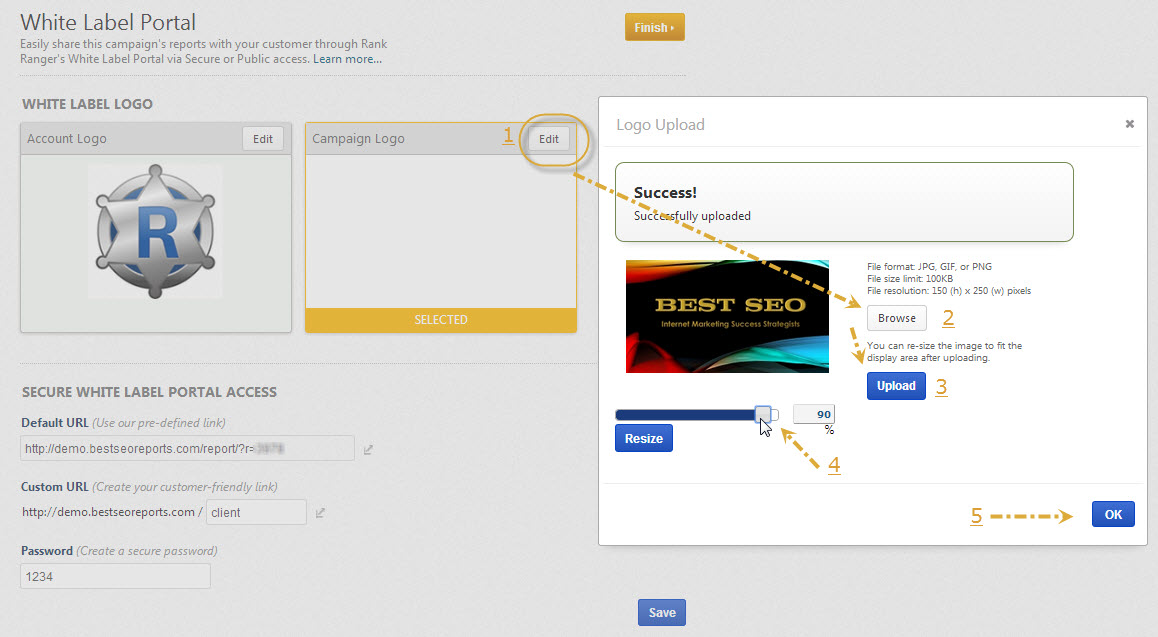
Client Dashboards: Display the account logo or upload a specific logo for each campaign through Campaign Settings > Client Dashboards

Account Logos
 

Upload Default Logo

 
Account Settings

To upload a general default logo from Account Settings:

  • Click on the person icon in the top right menu.
  • Click Account Logo(s).
Upload your logo

The Account Settings screen displays:

  • Click the Account Logo tab in the left navigation.
  • Click the Upload button in the Account Logo section.
  • Click the Browse button and navigate to/select your logo*
  • Click the Upload button.
  • After the file has uploaded, you can re-size it by dragging the slider to your desired size and clicking the Resize button.
  • Click the OK button.
This will be your default logo for all of your campaign reports unless you set campaign-specific logos.
* File format: JPG, GIF or PNG; File size limit: 100KB; File resolution: 150 (h) x 250 (w) pixels.


Upload White Label PDF Report Logos

 
Account Settings

Upload multiple White Label PDF Report logos in Account Settings and select individual logos when creating automated reports:

  • Click on the person icon in the top right hand corner of your screen.
  • Click Account Logo(s).
White Label PDF Report Logos

The Account Settings screen displays:

  • Click the Account Logo tab in the left navigation.
  • Click the Upload button in the Additional White Label PDF Logos section.
  • Click the Browse button and navigate to/select your logo*
  • Click the Upload button.
  • After the file has uploaded, you can re-size it by dragging the slider to your desired size and clicking the Resize button.
  • Click the OK button.

* File format: JPG, GIF or PNG; File size limit: 100KB; File resolution: 150 (h) x 250 (w) pixels.
Select WLPR logo

Set the White Label PDF Report logo in Report Content section:

  • In the Report Content screen*, click the existing logo to launch the Select Logo screen.
  • Click the new logo and the report will automatically update.

* Refer to the Add White Label Report Content section of our Automated White Label PDF Reports documentation.


Upload Campaign-Specific Client Dashboard Logo

 
Navigate to Campaign Wizard

To upload a specific logo for each campaign:

  • Navigate to Campaigns.
  • Click the Campaign Settings Gear button for the desired campaign.
Open White Label Wizard

Campaign Wizard:

  • Click the Client Dashboards tab.
Upload White Label Portal logo

Upload your Campaign-Specific Logo:

  • Click the Campaign Logo Edit button.
  • Click the Browse button and navigate to/select your logo*
  • Click the Upload button.
  • After the file is uploaded, you can re-size it by dragging the slider to your desired size and clicking the Resize button.
  • Click the OK button
  • Confirm that the correct logo displays "Selected" across the bottom and then click the Save button.
This logo will now appear at the top left side of your White Label interface and in your White Label PDF reports (you can select any logo that is in your account to display in any White Label report).
* File format: JPG, GIF or PNG; File size limit: 100KB; File resolution: 150 (h) x 250 (w) pixels.


Video: Uploading Logos to Your Rank Ranger Account


Get the ultimate SEO tools with the Rank Ranger Software
Learn More About Rank Ranger