If online reputation management is important to you, then consider a subscription to a custom Reputation Management plan. These plans include access to this report suite that helps you analyze positive and negative brand-related search results, and then monitor the progress of reputation management activities to improve brand sentiment.
Note: The Reputation Management report is an add-on product. Please email service@rankranger.com to request the add-on and for more information.
Note: The Reputation Management reports are supported for Google Desktop and Google Mobile search engines only.
- SEO
- Rank Tracker
- Local SEO
- Mobile SEO
- Link Manager
- Landing Pages
- Social Signals
- On-Page Optimization
- Enterprise SEO Solutions
- Marketing
- Competition Analysis
- Insight Graph
- Keyword Research
- Graphs & Widgets
- Market Reach
- Marketing KPI
- Brand Visibility
- White Label SEO
- Marketing Dashboard
- Client Dashboard
- PDF Reports
- PDF Templates
- Other
- Email Notifications
- Portfolio Management
- Integrations
- Google Analytics
- Search Console
- Pay Per Click
- WeDevelop
- API
Reputation Management Overview
Reports & Tools > Organic Search > Rank Tracking > Reputation Management
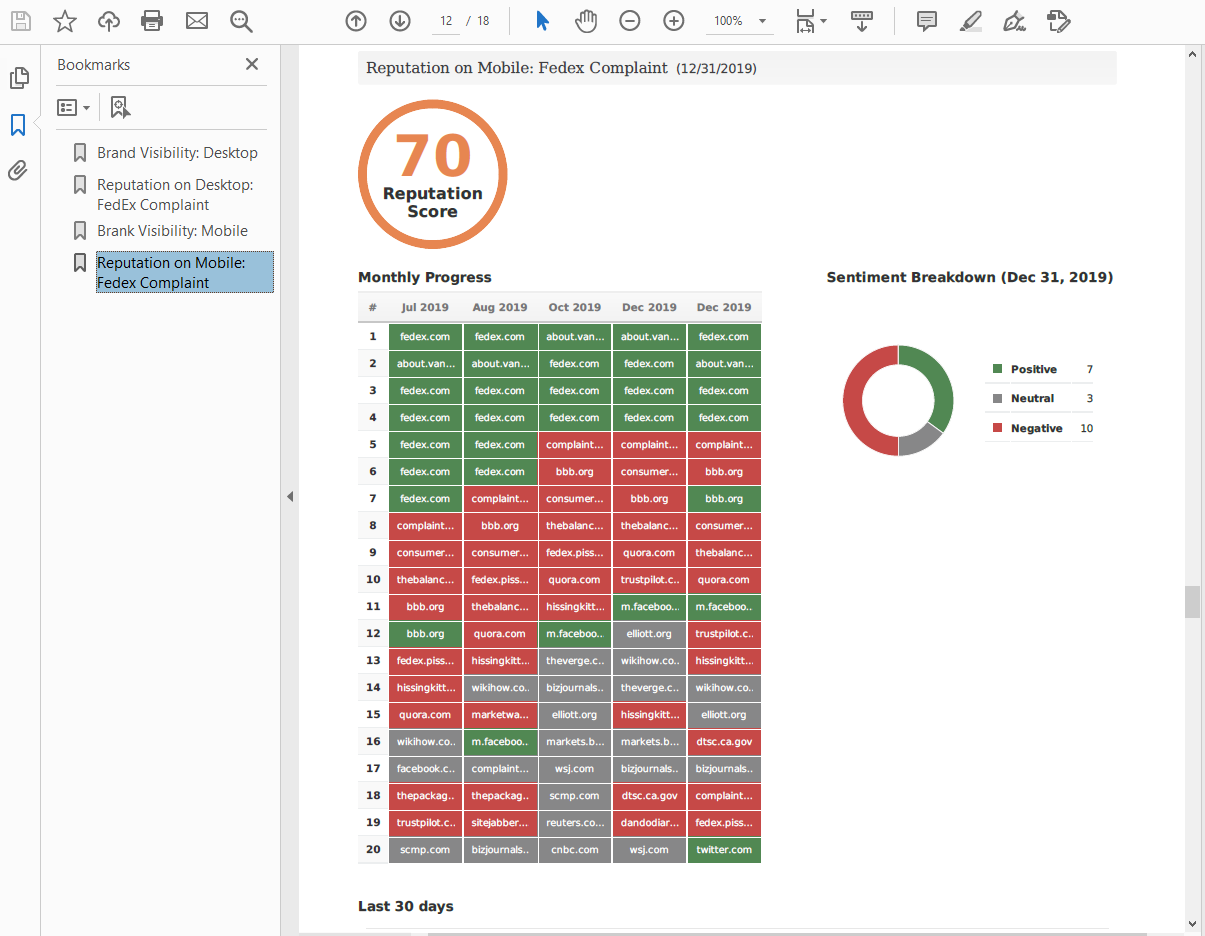
Online Reputation Summary
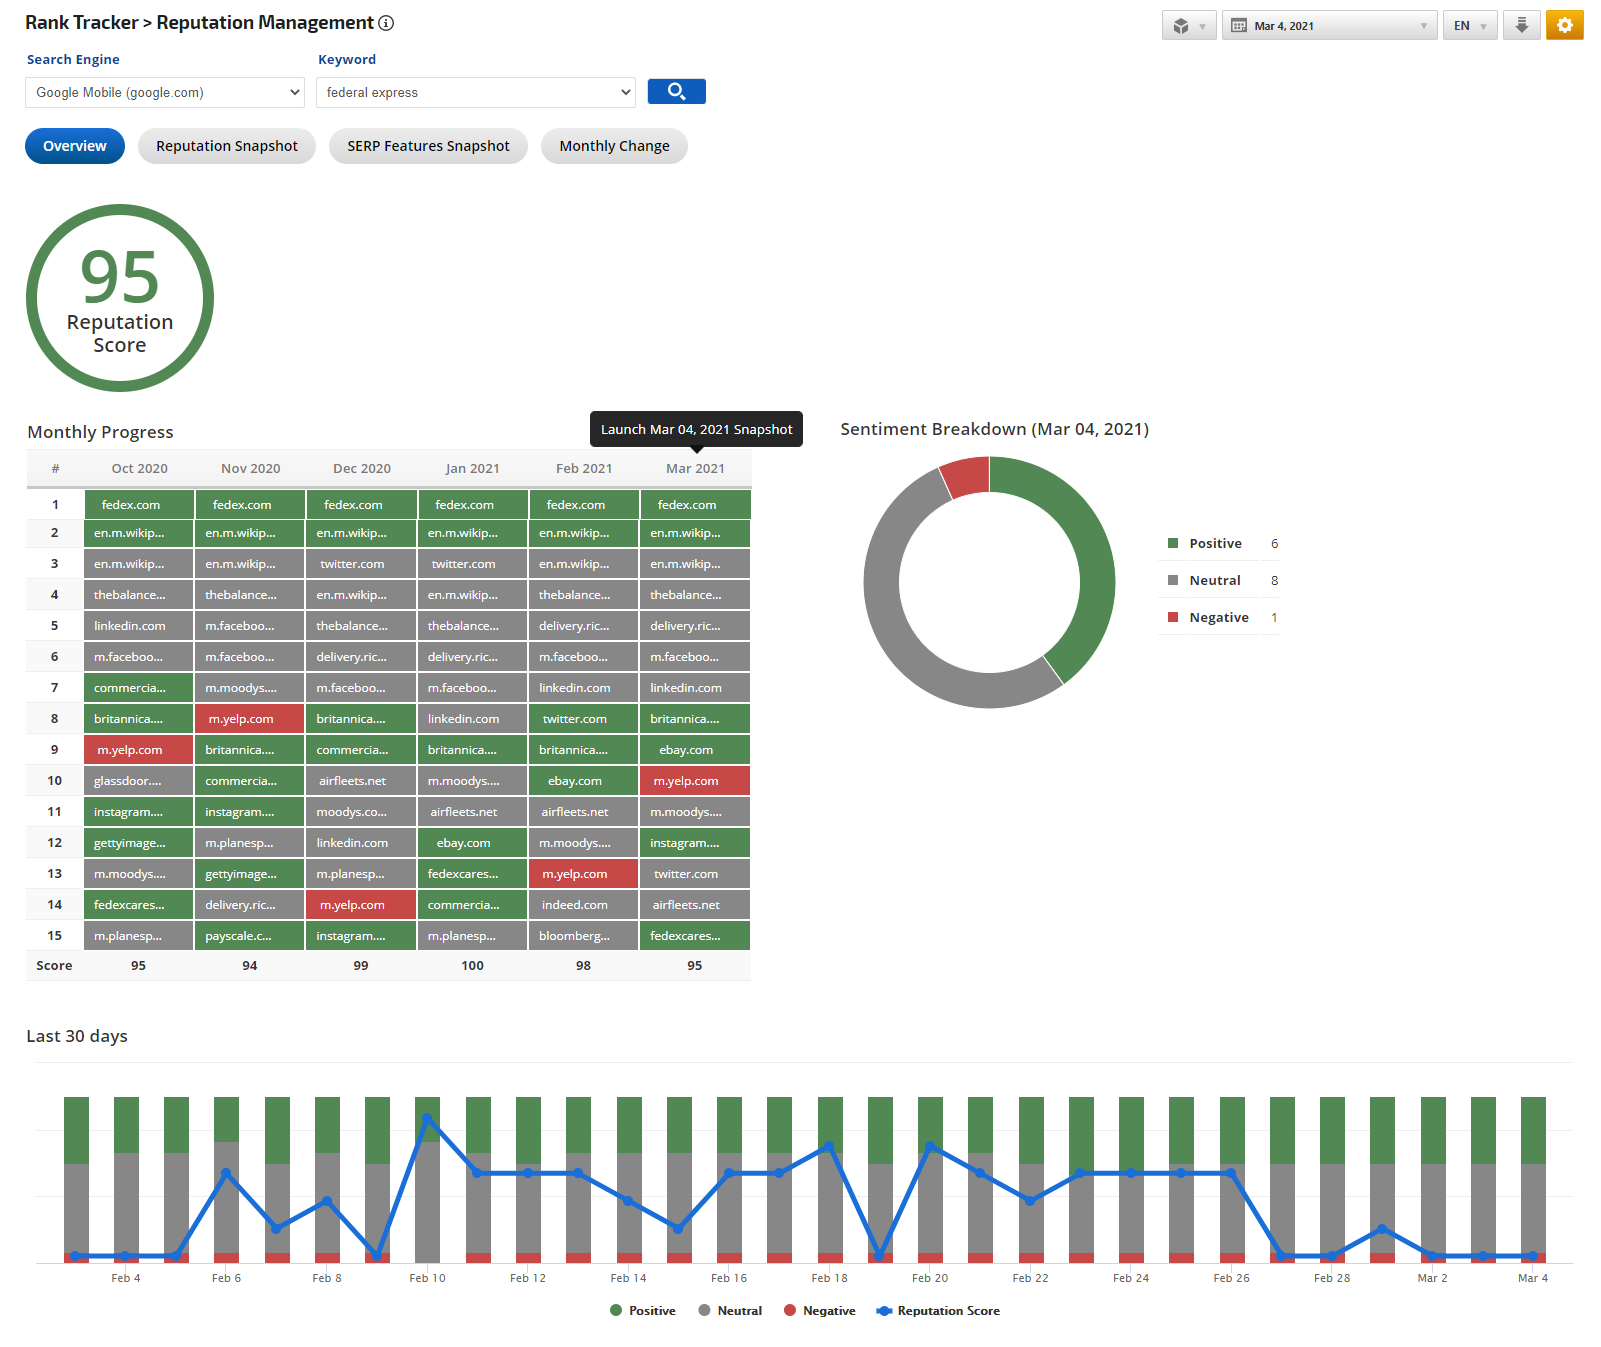
For the tracked domain and keyword, the Overview report provides a:
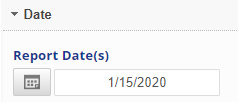
The Reputation Management Monthly Progress Score is a score of the day of the month represented in the table. In most cases, the score is the data of the first of the month. However, the score also depends on the report date selected. For example, if the report date is March 4, then the score of the month of March will be for that date and all the prior months will display the data of the first of the months.
Hover over the Months (heading of the table) to see the date of the score.
For the tracked domain and keyword, the Overview report provides a:
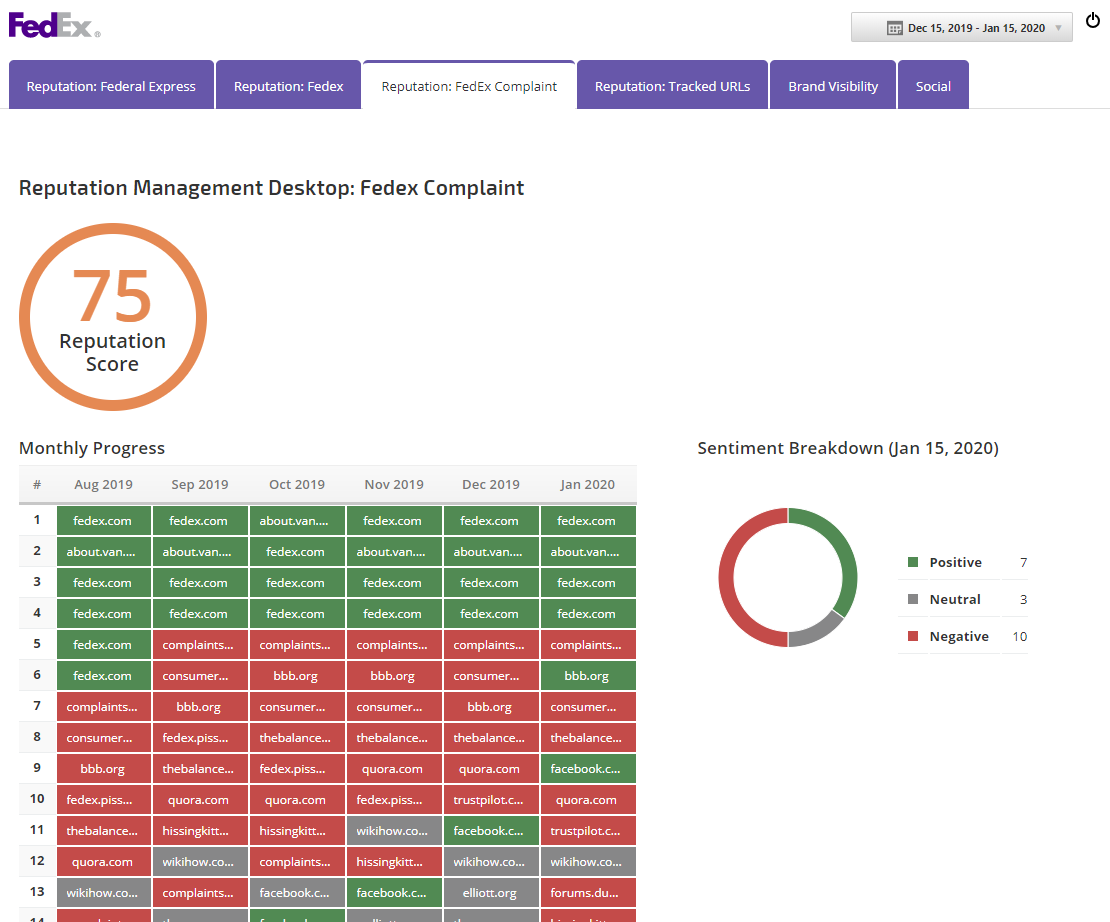
- Reputation Score is a weighted score based on the ranking positions of positive, neutral, and negative URLs for the requested date (the date selected in the date field).
- 6-Month Progress table with the top 10 search results domains, color-coded for positive, neutral, and negative brand impact
- Monthly Progress (Score) is an addition to the Monthly Progress table, which displays the Score for each month. The summary of the Reputation Management score helps to analyze the historical data.
- Sentiment Breakdown for the report date
- 30-day Trend Graph that is color-coded for positive, neutral, and negative brand impact, and includes the daily reputation score trend. Note that this data correlates to the campaign creation date (i.e., if the campaign was created 5 days ago, then only 5 dates will have data available in the graph)
The Reputation Management Monthly Progress Score is a score of the day of the month represented in the table. In most cases, the score is the data of the first of the month. However, the score also depends on the report date selected. For example, if the report date is March 4, then the score of the month of March will be for that date and all the prior months will display the data of the first of the months.
Hover over the Months (heading of the table) to see the date of the score.
 |
Date
|
 |
Display Settings
|
 |
Filters
|
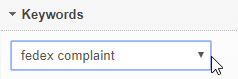 |
Keywords
|
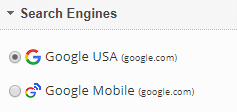 |
Search Engines
|
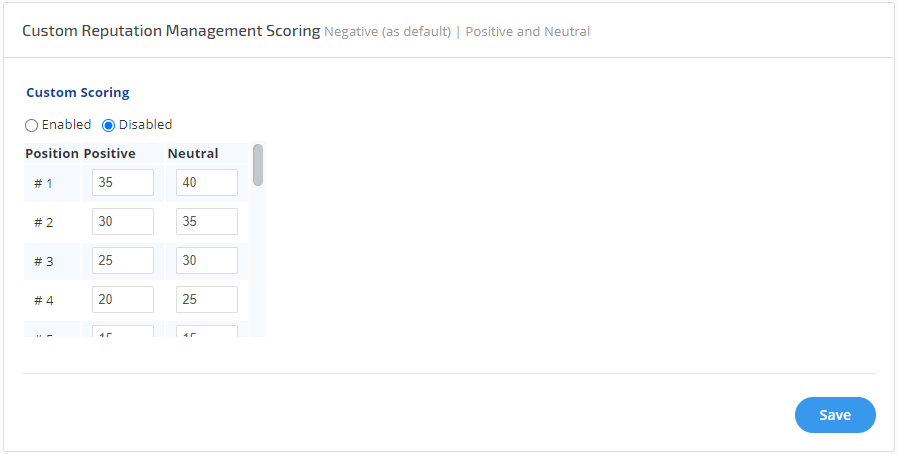
Custom Reputation Management Score Account Default Settings
Create your own custom Reputation Management Score for the Reputation Management Overview by Enabling the custom scoring and by specifying the core for each position for the Positive and Neutral results.
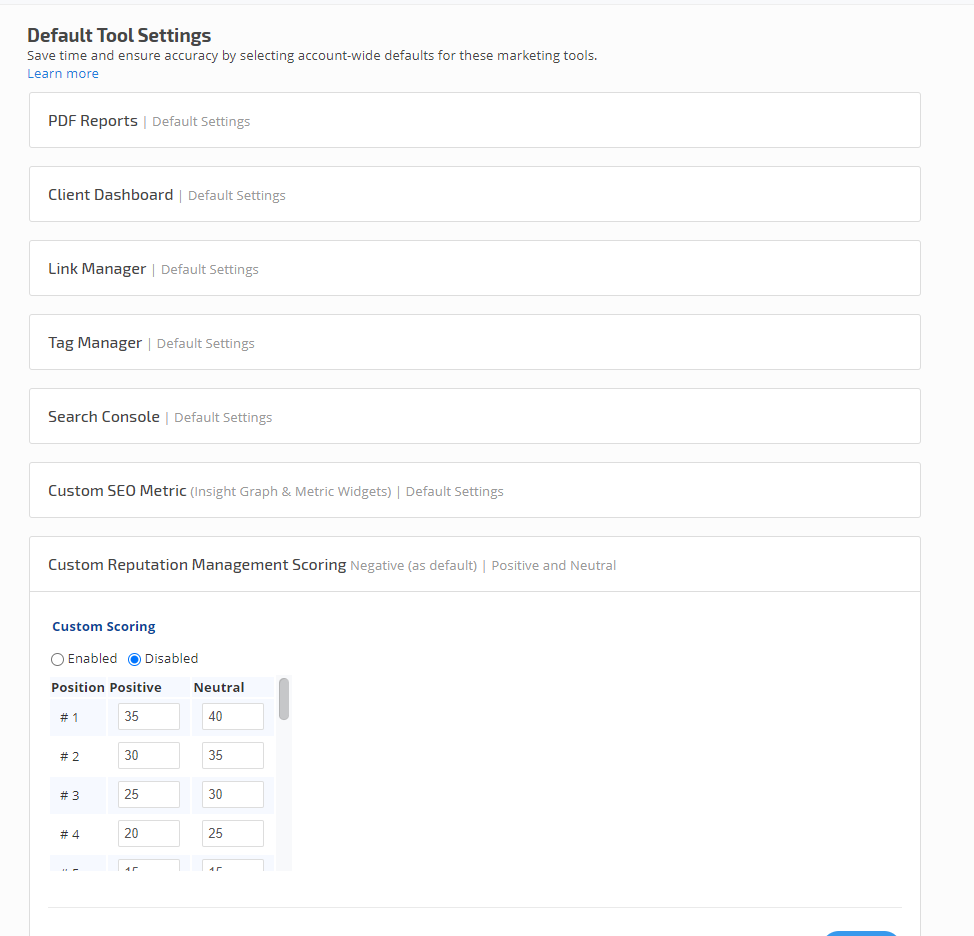
Custom Reputation Management Score
This tool allows you to set the value of score calculation for each rank in positions 1 through 20 for Positive and/Neutral results.
This tool allows you to set the value of score calculation for each rank in positions 1 through 20 for Positive and/Neutral results.
- Enable the Custom Scoring
- Specify your scores for positions 1-10 or 1-20. By default, all values for positions 11-20 have a value of 0.
- Click the Save button
When Custom Score is enabled then the calculation is done based on the values specified. Please make sure you specify the correct values that represent the score for each Positive and Negative result position.
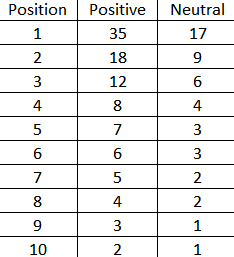
Below is an example of the values that can be assigned:
Once all is set click Save
How it works:
For example, the 1st position result is Positive, then the value for the score accumulation will be 35. Then the 2nd position result is Neutral then the value 9 is used for the score accumulations. Then the 3rd position result is negative the value 0 is used and so on.
Reputation Reports in Marketing Dashboards
Sharing Reports with Clients
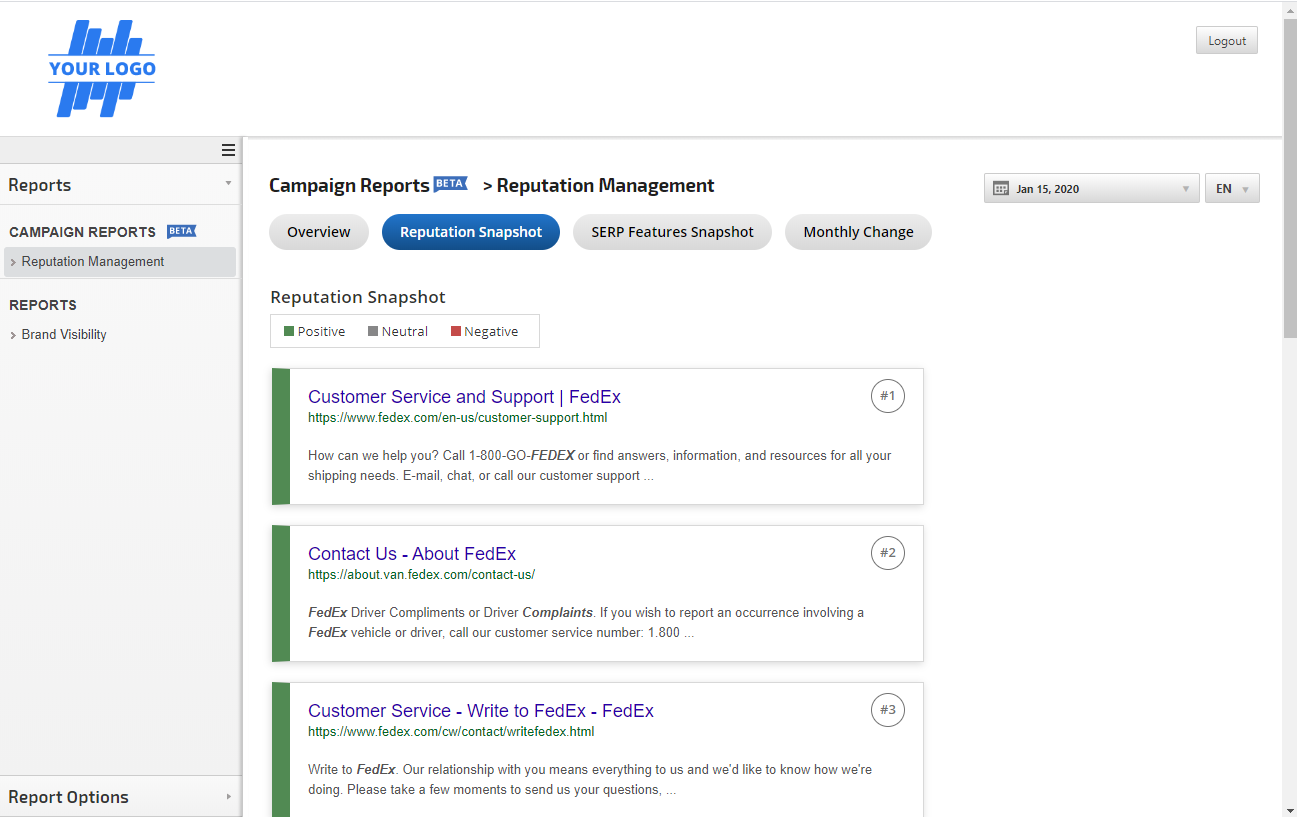
The Marketing Dashboard is a customer favorite because it allows sharing of a variety of reports with clients in a white label online dashboard that can be branded not only with logo but also with exact brand colors and custom layouts. In this example in addition to the Reputation Management reports, Brand Visibility and Social reports and graphs have been included.
The Marketing Dashboard is a customer favorite because it allows sharing of a variety of reports with clients in a white label online dashboard that can be branded not only with logo but also with exact brand colors and custom layouts. In this example in addition to the Reputation Management reports, Brand Visibility and Social reports and graphs have been included.
Campaign Settings > Marketing Dashboard
After adding the Reputation Management report to the Marketing Dashboard, expand the Display options and enable the sections that you want displayed in the dashboard and click the Save button. Refer to these instructions for:

After adding the Reputation Management report to the Marketing Dashboard, expand the Display options and enable the sections that you want displayed in the dashboard and click the Save button. Refer to these instructions for:
- Getting started with marketing dashboard settings
- Using built-in dashboard templates
- Customizing marketing dashboard layout and design
Reputation Reports in Client Dashboards
Sharing Client Dashboards
Client Dashboards allow for display of a brand logo and sharing of reports that are in a format similar to our software interface. Learn how to use Client Dashboard settings.
Client Dashboards allow for display of a brand logo and sharing of reports that are in a format similar to our software interface. Learn how to use Client Dashboard settings.
Settings Inside Individual Reports
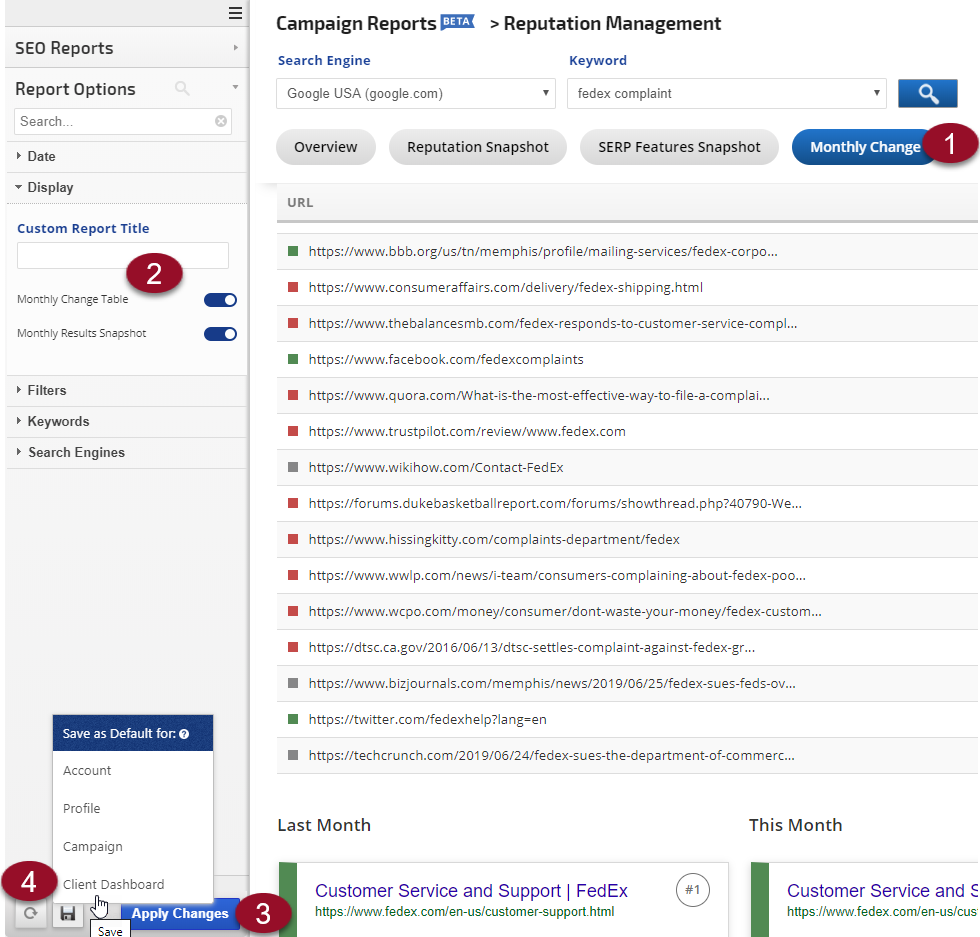
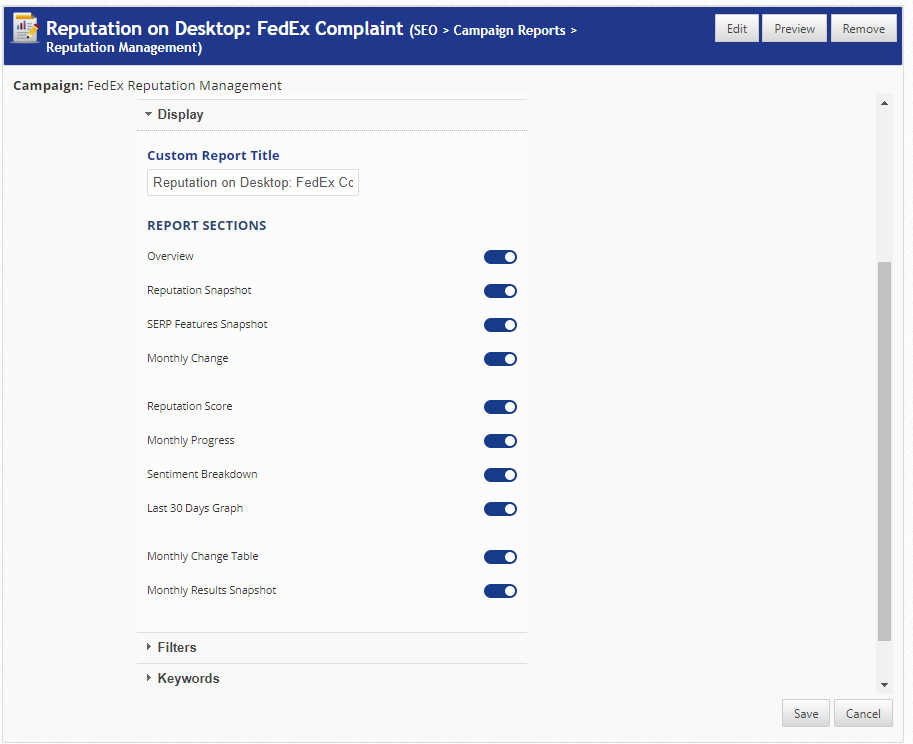
While in a Reputation Management report, if you want to include the Monthly Change report in the Client Dashboard you need to:
1. Click the Monthly Change report to display it
2. Expand Report Options and enable the Monthly Change Table and/or Monthly Results Snapshot
3. Click the Apply Changes button
4. Expand Report Options again and hover over the save icon and select Save as Default for Client Dashboard
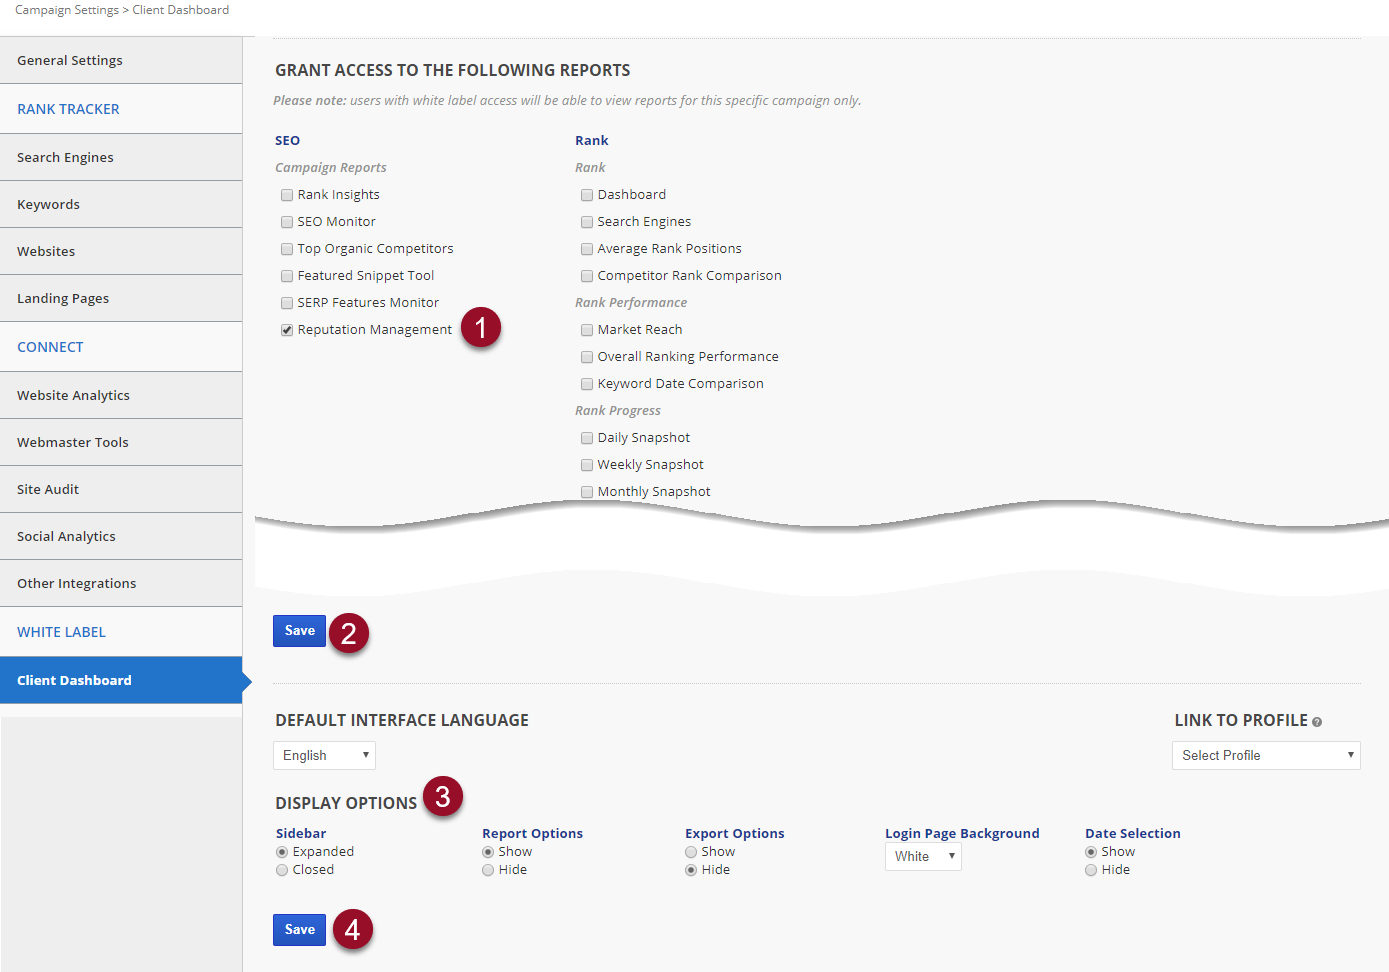
Campaign Settings > Client Dashboard
Open the campaign's settings and click Client Dashboard in the left sidebar.
1. Check the Reputation Management Report and any other reports that you want displayed in the Client Dashboard
2. Click the Save button
3. Select the Display Options that you want
4. Click the Save button
Open the campaign's settings and click Client Dashboard in the left sidebar.
1. Check the Reputation Management Report and any other reports that you want displayed in the Client Dashboard
2. Click the Save button
3. Select the Display Options that you want
4. Click the Save button
Reputation Reports in Email PDF Reports
Sharing PDF Reports
In case you prefer to send Reputation Management PDF reports to your clients, here is an example of how your report might display
In case you prefer to send Reputation Management PDF reports to your clients, here is an example of how your report might display
PDF Report Settings
To add a Reputation Management report to a scheduled PDF, after selecting the campaign you may enter a Custom Report Title and you must enable the report sections that you want displayed in the PDF and click the Save button. Follow these instructions for more information on creating white label PDF reports
To add a Reputation Management report to a scheduled PDF, after selecting the campaign you may enter a Custom Report Title and you must enable the report sections that you want displayed in the PDF and click the Save button. Follow these instructions for more information on creating white label PDF reports